Friday, December 29, 2017

Whole 30 Recipe Index


Last year throughout the month of January, I shared several of my favorite Whole 30 recipes here on KBStyled.  I teamed up with my bestie, Jennifer of Carolina Girl Cooks, to put together these delicious recipes for you all.

I'll be restarting Whole 30 again on 1/1/18 and I've heard from many of you that you will be doing the same.  I thought it would be easy to put these recipes together in one post so you don't have to search my blog for them.  Throughout the month of January, I will also be making and sharing some additional healthy recipes so be sure to check back often and stay tuned on my social channels as well.

One of the recipes that I am sharing is banana egg pancakes.  According to Whole 30, you should not make these because they are associated with a treat food (pancakes) and the concern is that you will allow yourself to fall off the plan if you are eating foods that you normally consider a treat.  The thought process is more around mental tenacity.  I make these because the ingredients are all Whole 30 compliant and I know I can personally maintain willpower and not fall off the plan eating these.  If you are afraid that you will not be able to stick to the plan, just skip these and don't make them.

Below, I will share the image of the recipe and then link provide a link to where you can get the ingredients and directions.  Let me know if you have any questions!

Cheers to a successful Whole 30 January and cheers to a great year ahead!  


I'd love to hear which recipes you try and what you would like to see more of!  Please feel free to leave a comment below!

Wednesday, December 20, 2017

It's a White (Sangria) Christmas - Cocktail Recipe


WELCOME!  If you are looking for an easy & festive holiday cocktail recipe, you have come to the right place.  Today I am sharing a delicious white sangria Christmas cocktail...just in time for the holidays.  Grab your pen and paper and add these ingredients to your grocery shopping list as I'm certain you will love this cocktail and so will your family & friends!

Come on in...let's make a cocktail together!


Photography by Madi Flournoy Henderson

WINE GLASSES || WOOD CHARGER *also used as a serving tray

I have always loved sangria (both red and white) so when deciding what type of cocktail to whip up for you all, sangria was an easy decision.  Not only does it taste great but it is super easy to make and it looks beautiful when served as well!

So here's what you'll need...

WHITE CHRISTMAS SANGRIA
serves 4 - double or triple the recipe if serving more
  • 1 bottle of Pinto Grigio 
  • 1/2 cup of white grape juice
  • 8-12 ounces of club soda 
  • 1 green apple
  • 1 red apple (Gala, Braeburn, Fuji, etc. will do)
  • 1/8 to 1/4 cup of sugar (1/8 if you prefer less sweetness)
  • fresh cranberries
  • fresh rosemary 
Let's put it all together...wash your cranberries (you can use as many as you'd like) and chop your apples into small cubes (not too small).  Put your fruit into a large pitcher and then add the sugar, club soda, white grape juice, and Pinot Grigio.  Stir the mixture well.  Add a couple of sprigs of rosemary into the mixture, stir again, and then refrigerate.  I recommend making this sangria ahead of time letting all of the flavors meld together for at least 6 hours.  You can also make it the night before.

When you are ready to serve your sangria, you can add a beautiful rosemary sprig to dress it up a bit.  To achieve a snowed on look all you have to do is lightly wet the sprigs of rosemary, shake off the access water, and then dip the dampened sprigs into raw sugar.  It looks beautiful and it tastes great too.  I found that the sprigs of rosemary got in the way a little bit when drinking the sangria but all you need to do is tuck it down into your glass.

Tip:  if you prefer sangria that is a little less sweet, you can always cut out the added sugar or even add a bit more Pinot Grigio.

Again it is super simple and so yummy...a definite crowd pleaser!  If you decide to make this for the holidays, I'd love to know what you think!

As always, thanks so much for stopping by...I hope you have a great day!

p.s don't forget to check out my sweet & savory roasted grape holiday appetizer HERE!

Monday, December 18, 2017

Sweet & Savory Roasted Grape Holiday Appetizer


Photography by Madi Flournoy Henderson

MY SWEATER || MY SKIRT || MY BOOTS || MY RINGS HERE & HERE


H O L I D A Y   R E C I P E 

ROASTED GRAPE GOAT CHEESE CROSTINI 

I'm excited to share one of my favorite holiday recipes with you all!  Several years back I stumbled upon a roasted grape & goat cheese dip, served with crackers, and I decided to tweak it a bit and create an easy DELICIOUS appetizer.  This roasted grape and goat cheese crostini recipe is simple to make and is a crowd pleaser!  A touch of rosemary creates a perfect holiday appetizer too.


I N G R E D I E N T S
  • red seedless grapes (roast as many as you think you'll need based on the number of people being served)
  • Italian loaf of bread (2 loafs if serving a larger group)
  • goat cheese log (if available, I purchase honey goat cheese, regular goat cheese will do as well)
  • chopped pecans
  • light olive oil
  • balsamic vinegar glaze 
  • pepper
  • rosemary sprigs 
  • honey
D I R E C T I O N S
  • preheat ove to 350
  • wash grapes and remove stems
  • mix approximately 2 tablespoons of olive oil with 1 tablespoon balsamic glaze (whisk together and add some fresh pepper into the mixture)
  • chop some fresh rosemary and add it to the olive oil, balsamic glaze, & pepper mixture and stir it all together
  • in a bowl, mix grapes with olive oil mixture and stir together to ensure that the grapes are coated
  • transfer to a baking dish and roast the grapes for approximately 45-60 minutes (grapes should appear soft and somewhat wilted)
  • while roasting, prepare your crostini by brushing a little bit of olive oil on each piece (I also let the goat cheese sit out for a bit to soften)
  • after roasting the grapes, toast your crostini until lightly toasted & golden (you don't want your crostini to be too crispy)
  • spread goat cheese on toasted crostini and then spoon on the roasted grape mixture
  • sprinkle chopped pecans on the toasted crostini and then drizzle honey over top
  • serve while warm
E A T  &  E N J O Y 

Thursday, December 14, 2017

Rustic Glam Christmas Tablescape


Photography by Madi Flournoy Henderson


I'm beyond excited to share today's post with you all...my rustic glam Christmas tablescape!  Sharing lifestyle posts is something that I plan to do more of in 2018 so I thought I would get a jump start and offer some decor inspiration for your Christmas table!

Christmas decor brightens and warms up our homes so much this time of year and for me personally, it brings me so much joy.  Creating a beautiful inviting tablescape adds more warmth to any home and it creates a welcoming space where people wish to congregate.  

Whether you are hosting family, friends, both, or just your immediate family for the holidays, my rustic glam Christmas tablescape is easy to create and it does not take a lot of time.  You can get inspiration from my tablescape or you can mimic this look by using the exact pieces shown here.  I hope today's post inspires you to create a beautiful table for whomever you are hosting this holiday season.

I planned my tablescape around this red & white striped tablecloth that I fell in love with!  It's not your traditional holiday tablecloth and that's why I love it so much.  You can use it for the holidays and for many other occasions as well.  I also adore the tassel fringe detail, which adds such a unique touch to this tablecloth.  And for the price (it's under $15), this tablecloth is high quality and is well made!

Pairing stripes with another print is always a great idea so I chose these forest green and white gingham cloth napkins next!  They come in a pack of 6 and are right at $15 as well.  They are high quality and perfect for your holiday gathering!  Gingham always feels a bit more casual (think picnic style) and I felt that these cloth napkins were in line with my rustic glam vision.  And how cute are these frosted foliage napkin rings?!  The pinecones give a woodland feel and the berries/frosted greenery adds a bit more glam to this napkin ring.

To keep with a rustic style, I chose some wood slab chargers as well as some small wood slices to set my tealight candleholders on.  I also selected flatware that looks like sticks!

For the "glam" element of my tablescape, I incorporated several mercury glass pieces like this pedestal hurricane candle holder, these pillar candle holders, and these tealight candleholders.  Mercury glass is so beautiful, especially when you light your candles and dim the lights...the light just glows off of the glass.

I finished my tablescape by adding some greenery that I picked up at Publix and some tree trimmings that I picked up from our local Christmas tree lot.  You can stop by your local tree lot and ask for tree trimmings (they should give the trimmings to you for free) and then you can create as much natural greenery for your table as you would like.  I also added fresh cranberries in the centerpiece to tie in the berries from the napkin rings and to pull it all together.  I would finish my table with a wine & water glass for me and Peter and a mason jar with ribbon and a little greenery for Reins and Addison.

Thank you for letting me share our rustic glam Christmas tablescape with you...I hope you find inspiration and if you do & wish to share how you were inspired on Instagram, please feel free to tag me @kbstyled or use the hashtag #kbstyled.

As always, thanks so much for stopping by...I hope you have a great day!
SaveSave

Thursday, December 7, 2017

Bold Yellow + Muted Metallics - Holiday Look


Photography by Madi Flournoy Henderson

SWEATER || SKIRT || HEELS || EARRINGS || BRACELET || RINGS

Try wearing something a little less traditional for the holidays like this bold yellow sweater and this muted metallic skirt!  No one wrote a rule in the holiday style book that said you had to wear red, green, black, gold, silver, etc.  I personally like a bit more color and that's why I went with this bold yellow.

Throughout the winter season, you can wear this sweater with denim too.  This sweater is soft and plenty warm and the slight bell sleeve adds visual interest.  If yellow isn't your color, this sweater also comes in 5 other colors!  I love it so much that I'm going to order it in a couple more colors!

This metallic skirt has an elastic waist band so it is also very comfortable to wear.  Instead of wearing open toe heels, you can always wear tights and booties with this skirt as well.  It is so versatile so you can truly dress it up as much as you'd like or dress it down.

Do you like wearing bold colors throughout the holidays?

As always, thanks so much for stopping by and I hope you have a great day!

Tuesday, December 5, 2017

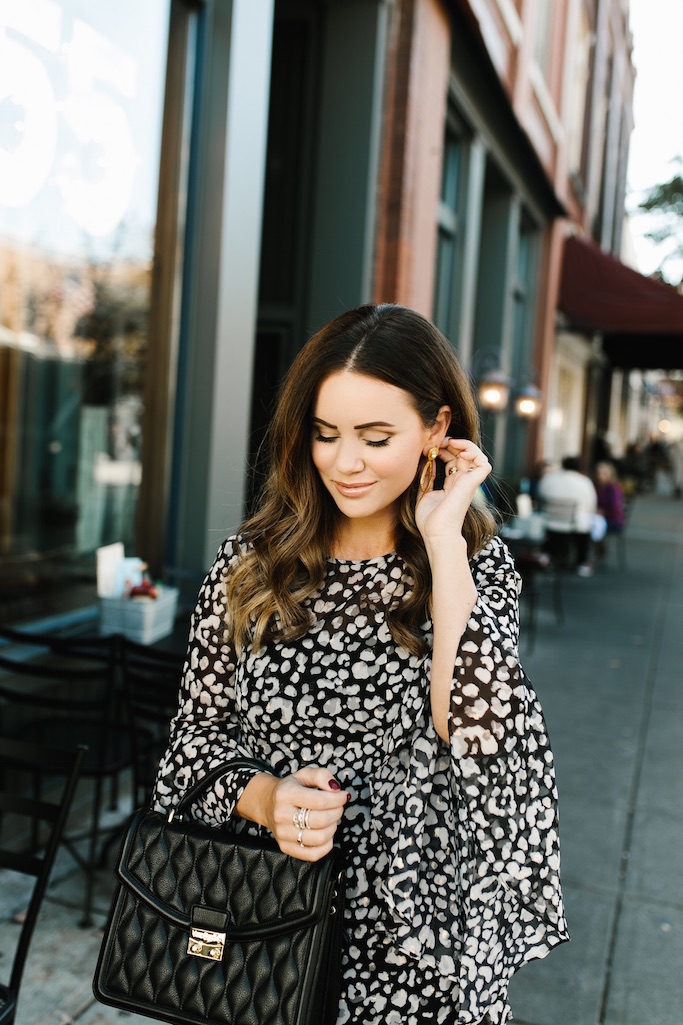
Cheetah Print Bell Sleeve Eliza J Dress


Photography by Madi Flournoy Henderson


When a dress has all of the bells and thrills, I usually cannot resist such beautiful feminine details.  From the cheetah print to the exaggerated bell ruffle sleeves, this dress is one that will certainly stand out.  What you can't see is the soft gold metallic detail that highlights the cheetah print!

As you shop for dresses, I recommend picking pieces that are versatile and that can be worn for a variety of occasions.  I've worn this Eliza J dress to work functions, church, and for an evening out.  It's not too dressy but dressy enough.

The dress is fully lined except for the sheer sleeves and it is an a-line fit.  The ruffle hemline flares out slightly to add a little more free movement when you walk!

Eliza J has such beautiful classic dresses...ones that are on trend but will not go out of style over the years.

As always, thanks so much for stopping by and have a wonderful day!

Friday, December 1, 2017

My Daily Makeup Routine


I'm excited to share today's post...my daily makeup routine!   One of the questions that I get asked most is about my makeup and what I use each day.  I don't wear a TON of makeup and my routine is pretty straightforward and rather simple too!

As I made these collages, I actually forgot to put in the CC Cream that I use before applying my foundation and I just realized that I left it off.  Instead of redoing everything, I'm linking my CC Cream HERE!  A CC Cream is great for color correcting your skin prior to applying your foundation and for me, it helps reduce the redness in my skin and it also moisturizes my skin as well.  Essentially...applying my CC Cream is the first step.

I've shared my daily routine on Instastories so if you also follow along with me there, stay tuned as I will continue to share some makeup tips and tricks there as well!  Ultimately I'd love to be able to put together a full video for you all with my routine from beginning to end...hopefully I will accomplish this sooner than later as I know many of you would love to be able to have me visually walk you through my routine.  So stay tuned for that too!

In the meantime, I am going to walk you through my routine as best as possible...let's get started!

Prepping my face:  I prep my face with SkinMedica's Vitamin C+E complex & I also use Origins ginseng eye cream.  I then apply a thin layer of my favorite CC Cream.  I use my beauty blender to blend it into my skin before applying my foundation.

The foundation:  Next I take my flat top foundation brush and apply a thin layer of my favorite foundation, Estee Lauder's Double Wear foundation.  Once my foundation is applied, I use my creaseless concealer and apply some of the concealer under my eye with my finger.  I then use my beauty blender to blend out the concealer.  After blending, I "bake" my concealer by tapping on a layer of the Laura Mercier translucent powder under my eye.  I let the powder sit for 5 minutes as I am finishing the rest of my makeup before dusting it off with my powder brush.

Natural flush, bronzer & highlighter:  My absolute favorite blush is this amazonian clay 12 hour blush...I have several shades of this blush but my favorite is "natural beauty"!  I apply blush in an upward motion on my cheekbones with my french boutique blush brush.  I then use the same blush to add a smidgen of contour slightly under my cheekbone with my Bronze Goddess bronzing powder.  I also apply a little bit of the bronzing power to my temples, hairline, and jawline.  Lastly, I will add a bit of highlighter on the top part of my cheekbone/temple, under the eye area, with my Hourglass Strobe Lighting powder in Euphoric.

Simple everyday eyes:  I've used this Chai Latte quad eyeshadow palette FOREVER and I only use the crease color within my crease...it is really all that I need for a simple everyday eye.  I use my dual eyeshadow brush to apply my shadow.  I've had my eyebrows microbladded, you can read my post about microbladding HERE, so I only need to touch up my eyebrows with all small amount of brow powder.  My favorite brow powder is the Anastasia brow powder duo.  I use my build a brow brush to apply the brow powder.  I line my the top of my lid with this Expert Liquid Liner.  If I do line the lower lash line, I do not use liquid liner but instead a dark brown or light black eye shadow to create a much more subtle line.  To finish my eyes, I typically apply 2-3 coats of mascara with two different mascaras...both in glam black and blackest black.  My first coat is with this Voluminous Feline Mascara and my second coat with this Volum' Express Pumped Up! Colossal Mascara.

Finishing touches: Often times I finish by lining and filling my lips in with this ColorStay Lip Liner in "mauve".  I line and then fill in my lips with this pencil for a more matte natural look.  I also love this gloss in Dancing Star topped with this gloss in Celeste.  When wearing a more bold lip, I love a great red lipstick and my favorite is Russian Red!

My routine takes no more than about 10 -15 mins!  Please let me know if you have any questions...I'm more than happy to answer them!

As always, thanks so much for stopping by...hope you have a wonderful Friday!